- April 10, 2023
- Posted by: Muhammad Shoaib Afzal
- Category: II. Business Setup

Vaival ERP software helps organizations to automate and streamline their business processes. It integrates all the different aspects of a business, such as accounting, human resources, inventory management, financial management, etc. Out of all Business Setup is a major module. It helps the user in adding vendor, customers, basic chart of accounts and misc. important things as you can see the image below.
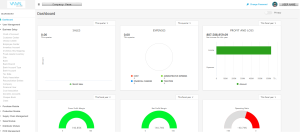
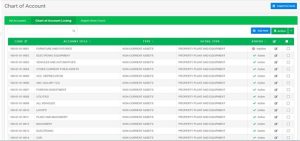
Chart of Account
The term “chart of accounts” refers to a listing of the accounts used by a company in its accounting system. The chart of accounts includes all the accounts that are used in the ledger to record transactions. Here you can add any number of chart of accounts. But basic accounts integrated with Profit & Loss Accounts and Balance Sheet, are provided in default mode.
Figure: Business Setup > Chart of Accounts
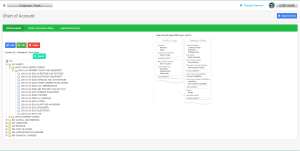
Tree View Option:
We also provide the user Tree view of all Charts of Accounts, so that they can have the idea and understanding about each head and how they are going to appear in the system. Our system let you open inventory in four level and the Journal entry level is 4th level.
Figure: Business Setup > Chart of Accounts > Tree View
- Add New Chart of Account
To open a New Account, you have to click the plus sign on top right corner “Add New”. After clicking this button, a pop-up window will open asking for the following details.
Figure: Business Setup > Chart of Accounts

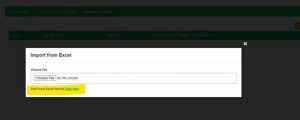
You can also add Chart of Accounts by uploading an excel sheet, for this you have to download an excel format from “Import from Excel” screen and fill in data as per the format and upload bulk Chart of Accounts. You can also export Chart of Accounts sheet, when necessary, from “Export to Excel” option.
Figure: Business Setup > Chart of Accounts > Import from excel

To download the Excel format, you have to click on, “Don’t have Excel Format Click Here” that will appear below the choose file option.
Figure: Business Setup > Chart of Accounts > Import from excel 2

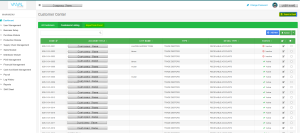
Customer Center
In this screen you can will add your customers. By clicking on “Add New” a new window will pop-up and will asking about customer information. After adding the desired information, you must click “Save”.
Figure: Business Setup > Customer Center
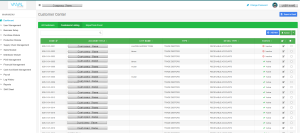
Figure: Business Setup > Customer Center 2

Tree View Option:
We also provide the user Tree view of all Customers, so that they can have the idea and understanding about each head and how they are going to appear in the system. Our system let you open inventory in four level and the Journal entry level is 4th level.
Figure: Business Setup > Customer Center > Tree View

You can also add Customers by uploading an excel sheet, for this you have to download an excel format from “Import from Excel” screen and fill in data as per the format and upload bulk Customers. You can also export Customer sheet, when necessary, from “Export to Excel” option.
Figure: Business Setup > Customer Center > Import & Export
To download the Excel format, you have to click on, “Don’t have Excel Format Click Here” that will appear below the choose file option.
Figure: Business Setup > Customer Center > Import from excel 2

Vendor Center
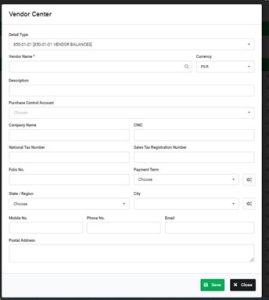
In this screen you can will add your vendors. By clicking on “Add New” a new window will pop-up and will asking about vendor information. After adding the desired information, you must click “Save”.
Figure: Business Setup > Vendor Center
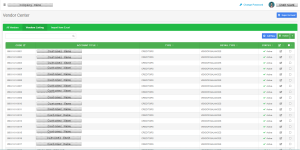
Figure: Business Setup > Vendor Center 2
Tree View Option:
We also provide the user Tree view of all Vendors, so that they can have the idea and understanding about each head and how they are going to appear in the system. Our system let you open inventory in four level and the Journal entry level is 4th level.
Figure: Business Setup > Vendor Center > Tree View

You can also add Vendors by uploading an excel sheet, for this you have to download an excel format from “Import from Excel” screen and fill in data as per the format and upload bulk Vendors. You can also export Vendor sheet, when necessary, from “Export to Excel” option.
Figure: Business Setup > Vendor Center > Import & Export

To download the Excel format, you have to click on, “Don’t have Excel Format Click Here” that will appear below the choose file option.
Figure: Business Setup > Vendor Center > Import from excel 2

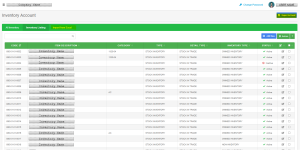
Inventory Account
In this screen you can will add your vendors. By clicking on “Add New” a new window will pop-up and will asking about vendor information. After adding the desired information, you must click “Save”.
Figure: Business Setup > Inventory Account

Figure: Business Setup > Inventory Account 2

Tree View Option:
We also provide the user Tree view of all Inventory Accounts, so that they can have the idea and understanding about each head and how they are going to appear in the system. Our system let you open inventory in four level and the Journal entry level is 4th level.
Figure: Business Setup > Inventory Account > Tree View

You can also add Inventory Accounts by uploading an excel sheet, for this you have to download an excel format from “Import from Excel” screen and fill in data as per the format and upload bulk Inventory Account. You can also export Inventory Account sheet, when necessary, from “Export to Excel” option.
Figure: Business Setup > Inventory Account > Import & Export
To download the Excel format, you have to click on, “Don’t have Excel Format Click Here” that will appear below the choose file option.
Figure: Business Setup > Inventory Accounts > Import from excel 2
Fixed Asset Inventory
This screen is used to add Fixed assets in the system. This segment does not just add fixed asset by name but also manage fixed assets, meaning, which asset is held by which custodian (Employee), currently. You also have attached reports in this screen as “xlsx & Print (PDF)” form.
Figure: Business Setup > Fixed Asset Inventory

Figure: Business Setup > Fixed Asset Inventory > Add Fixed Asset
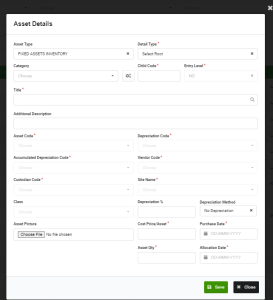
Figure: Business Setup > Fixed Asset Inventory > Fixed Asset Transfer
![]()
Tree View Option:
We also provide the user Tree view of all Fixed Asset Inventory, so that they can have the idea and understanding about each head and how they are going to appear in the system. Our system let you open inventory in four level and the Journal entry level is 4th level.
Figure: Business Setup > Fixed Asset Inventory > Tree View

This segment also has a screen of “Issue Asset” which means you can add a fixed asset and issue that asset right away to any employee.
Figure: Business Setup > Fixed Asset Inventory > Issue Asset

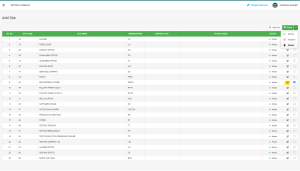
Site
If a business has more than one site operational, this is the screen that gives user the right to add more than one site. This site field will appear in all vouchers; Receipts, Payments, Purchase, Sales etc. before saving any invoice or voucher the system will ask to allocate a specific site. And will not save any invoice or voucher without site. If a business has more than one site, by allocating site while adding any transaction, system will create reporting of that site separately in the reports module.
Figure: Business Setup > Site
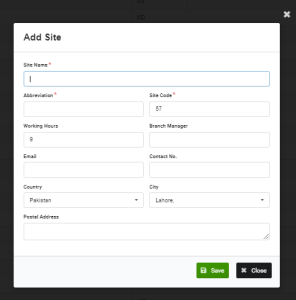
 To add a new site in the system, click on “Add Site” and a pop-up will open. Provide the information required and click on “Save”. The new site will appear on the list with other sites.
Figure: Business Setup > Site > Add Site
If you want to edit any site information you will click on the highlighted icon shown in the figure below. If you want to delete permanently or want to in-active temporarily a certain site. You have to click the checkbox and select these options from the Action dropdown options.
Figure: Business Setup > Site > Edit, Delete, Active or In-Active
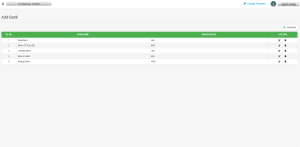
Bank
From this screen you can add your business banks into the system and this will help you with your monthly bank reconciliations that you can perform from cash and bank management module. As you can record bank transactions, the system will maintain bank’s ledger as it does with other chart of account heads.
Figure: Business Setup > Bank
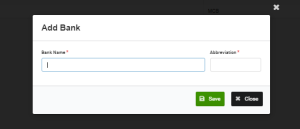
As you click on the Add bank, a pop-up will appear asking for bank name and its abbreviation that you want to use in the system. After giving the information click on “Save”.
Figure: Business Setup > Bank > Add Bank
You can always edit & delete the given information from the following icons.
Figure: Business Setup > Bank > Edit & Delete
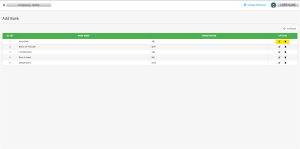
Bank Branch
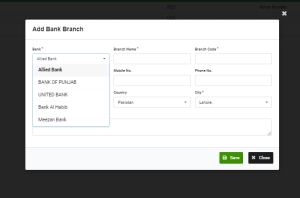
If you use different branches of the same bank and want to segregate your reporting as per branch you can open these branches from this screen. This screen allows you to add multiple branches of same bank. As you click on the Add Bank Branch a pop-up will appear and it will ask you to give details. It will ask you to select one bank from the number of banks that you have added in previous screen. After giving the information click on “Save”.
Figure: Business Setup > Bank Branch

Figure: Business Setup > Bank Branch > Add Bank Branch
You can always edit & delete the given information from the following icons.
Figure: Business Setup > Bank Branch > Edit & Delete

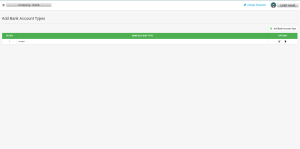
Bank Account Type:
From this screen you can specify which type of bank accounts you are using. It will further enhance your decision making as from a pool of data, you will be able to recognize which bank accounts are current accounts and which are saving etc. These are more useful for businesses which operate in a highly complex structure with a lot of branches across the country. For small businesses this information is not necessary.
Figure: Business Setup > Bank Account Type
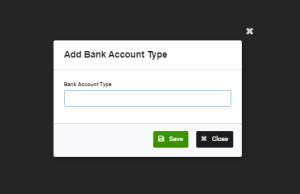
 To use this feature, you click on the Add Bank Account Type, a pop-up will open and it will ask about the bank account type. After giving the information click on “Save”.
Figure: Business Setup > Bank Account Type > Add Bank Account Type
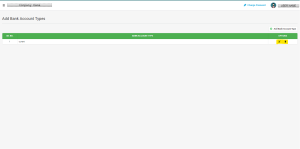
You can always edit & delete the given information from the following icons.
Figure: Business Setup > Bank Account Type > Add Bank Account Type > Edit & Delete
Bank Account:
After giving system all about your bank, now on this screen you will enter your bank account information i.e., your account number, account title etc.
Figure: Business Setup > Bank Account

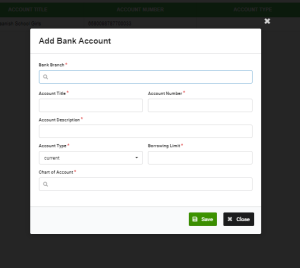
As you click on the Add Bank Account, a pop-up will appear and it will ask you to give details. It will ask you to select information that you provided earlier in bank details like bank branch from the branches you have added etc. After giving the information click on “Save”.
You can edit & delete the information whenever you need to.
Figure: Business Setup > Bank Account > Add Bank Account
Tax Rate:
This screen allows you to add tax rates, that you use. When you open this screen, you can see some tax rate added in default you can edit them and you can also add new.
Figure: Business Setup > Tax Rate

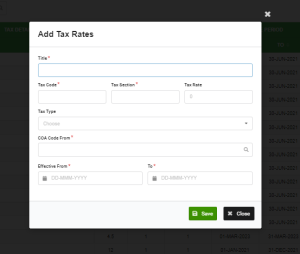
As you click on the Add Tax Rate, a pop-up will appear and it will ask you to give details. After giving the information click on “Save”.
Figure: Business Setup > Tax Rate > Add Tax Rate
Financial Year
This screen allows you to add your financial year in the system. You can edit & delete this information.
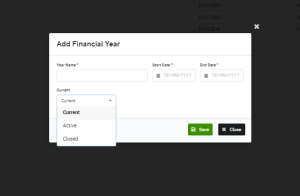
As you click on the Add Financial Year, a pop-up will appear and it will ask you to give details. The system will ask you three options in this section i.e., either the system is current, active or closed. If you select Current this means the system will let you enter data and execute transaction in this year as this will be considered as operational year. If you select Active it means whether the year is current or not but it’s still active for adding and editing information. This option is used when you enter a new financial year but previous year is still closing. If you choose Closed the system won’t let you enter any data in that year. After giving the information click on “Save”.
Figure: Business Setup > Financial Year
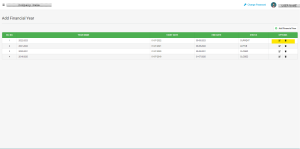
Figure: Business Setup > Add Financial Year
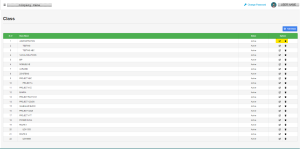
Class
This screen will allow you to add classes and allocate them to a specific site. It means adding more sub sites under one site. This also effects the reporting as you can get Profit & Loss statement by class and by site in our Reporting module.
Figure: Business Setup > Class
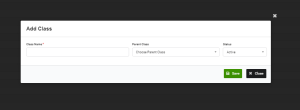
As you click on the Add Class, a pop-up will appear and it will ask you to give details. It will ask you to give a parent class. After giving the information click on “Save”.
You can edit & delete the information whenever you need to.
Figure: Business Setup > Add Class
1 Comment
Comments are closed.

[…] i.e., Raw Material and Finished Goods. To learn how to add inventory please read our blog on Business Setup, that will guide you on how you can add inventory into the system. After providing a system with […]