- March 30, 2023
- Posted by: Muhammad Shoaib Afzal
- Category: XI. Payroll

PAYROLL MANAGEMENT
Vaival ERP is an enterprise resource planning (ERP) software that offers a wide range of features, including payroll management. The payroll feature of Vaival ERP provides a comprehensive solution for managing all aspects of payroll, from calculating employee salaries to generating payroll reports weekly, monthly, quarterly, biyearly and yearly basis. Some of the key features of the Vaival ERP payroll module include; Employee data management, Salary calculation, Pay slip generation, and Customizable reporting.
These are the following screens that you can manage in Vaival ERP Payroll Management Modules:
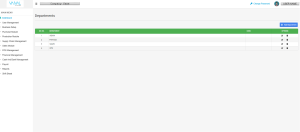
1- Departments
This screen in the payroll module helps in managing the employee information department-wise. These departments are also integrated with other modules within the system, such as, financial management module, cash and bank management module and reports module in order to ensure accurate and efficient processing of payroll. This is a one-time activity to set up departments of your business and bifurcate or allocate your employees according to their relevant departments.
You can add a department by clicking on Add Department.
Figure: Payroll > Add Department
2- Designations
Designation of an employee is stored as part of their personal information and is used to automatically determine their compensation and benefits package. Examples of common designations include Manager, Engineer, Assistant, Director, and so on.
You can add a department by clicking on Add Designation.
Figure: Payroll > Add Designation

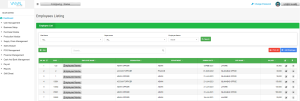
3- Employees
As you open this screen you can see all the added employees in the system you can get an excel list of all those employees, moreover you can also see your employees from the filters provided as site wise, department wise and according to their active status.
As you enter any employee, here the system automatically opens up three accounts; Salary, Advance and Loan account now you have 3 accounts for each of your employees.
Figure: Payroll > Employee Listing
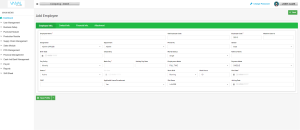
You can add new employees by clicking on add employees. In this screen the system stores employee information such as name, address, job title, tax information, basic salary and other relevant details. The payroll module uses this information to calculate and manage payroll, including calculating salaries, taxes, and allowances.
Figure: Payroll > Add Employees
4- Process Salary
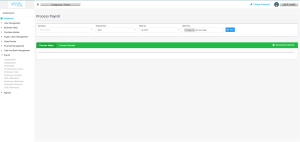
On this screen you can add monthly salaries of employees that you previously added in the system from the previous “Employee Screen”. The system will ask you about the site of the employees, then Fiscal year, and month, that which you want to process salary. Our system is built to process your monthly employee salaries in one click.
Figure: Payroll > Process Payroll
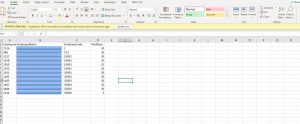
As you give the filters to the above said screen, you need to click on “Get Excel Format File”. In this file you will be asked to give the total month days as 30, 31 etc. If you have a new employee or any employee who left your job during the month the system will automatically calculate its salary based on the days you provided in this format and the basic salary of that employee that you have added in the “Add Employee” screen.
Figure: Payroll >Process Payroll >Get Excel Format File
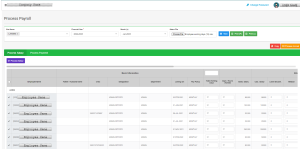
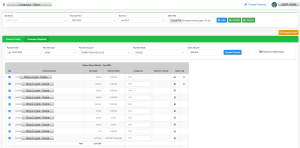
After adding the no. of days in the excel format you need to upload this on the system by clicking at “Choose File” in Select File field and choose month then click on view, it will automatically load a sheet containing Employee data, their working days, basic salaries, further you have to add manually; their allowances and deductions. After adding the values, the system will calculate Net Salary based on the provided data.
Figure: Payroll > Process Salary> Salary Calculation

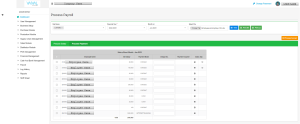
After you have added all the allowances and deductions of employees you need to tick the checkbox present before Employee Name and click on the purple button “Process Salary” to save the salary.
Figure: Payroll > Process Salary> Purple Button Process Salary

To Process Accrual, you have to allocate a site to the employee. As you allocate a site to the employees who have been saved with Payroll Process, click the “View” button, the system will give you a “Process Accrual” option on the right side of the screen in mustard color.
Figure: Payroll > Process Salary> Mustard Button Process Accrual
Note: You always have to allocate a site before processing accrual otherwise the system won’t give you any option to Process Accrual. You can Process Payroll meaning, adding and saving salary without specifying site but you cannot process accrual of salaries without site.
Figure: Payroll > Process Salary> After Process Accrual
Once you have processed accrual, the system automatically creates Accrual Vouchers against the employees. The voucher is named as “AV” and it will appear in each employee’s ledger in Reports, “Subsidiary Report”, and out of all three employee accounts; Salary Account, Advance Account, and Loan Account this AV will be present in Salary Account.
The voucher that system posts automatically look like this, it is present in reports that would be further explained in “Reports” blog.
Figure: Payroll > Reports > Reports Center > General Reports > Subsidiary Ledger
 After you have processed the Accrual, you click on the “Process Payment” screen here you can see the employees that you processed on Process Salary, as you click on checkbox presented before each employee, few fields will appear below process payment, asking for payment date, payment type; cash or bank, if you have added various bank accounts it will also ask which account the payment is made from, payment mode, credit amount; this field gives sum of the amount of employees salary whose checkbox is ticked.
Figure: Payroll > Process Salary> Process Payment

Another checkbox appears on the right side of these fields. This feature is used when you have withdrawn one cheque against all the payments or partial payment from one cheque. When you click on this checkbox and write on any ticked field in the Cheque no. column the same cheque no. is copied to all the ticked employees. Meaning that their salary was paid from the same cheque. Then you have to click on the Process Payment button to process this payment.
Figure: Payroll > Process Salary> Process Payment > One Click Bank Payment
Whether you pay from cash or bank account, the payment will reflect in the Financial Management Module, updating your bank and cash ledgers automatically. If this is a bank payment it will reflect in cheque status by searching cheque no. for Bank Reconciliation process, as explained in Cash and Bank Management blog.
5- Employee Accounts
This screen allows the user to customize Salary allowances and deductions. In the previous screen in process salary, you have seen a few columns for allowances and few columns for deduction. In this screen you can add and less those as per your requirement.
Figure: Payroll > Employee Accounts
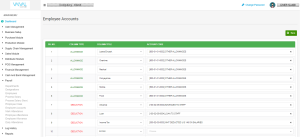
In this screen you can select the column title of your salary sheet and also select, in which account do you want to maintain its ledger. Like in the figure above you can see that; Allowance has a column title of leave encashment and its allocated account code is “Other Allowances” meaning the amount entered in this field while entering salary will be reflected in this ledger in Reports. After selecting your desired allowances and deductions head on, in case you don’t want to add anything, select column name “Others” and do not allocate any account code. After making the required changes you can press save.
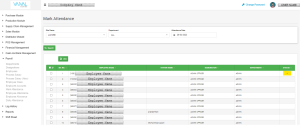
6- Mark Attendances
Vaival ERP also allows you to Mark attendance on a regular basis. On this screen you can mark attendance of employees all at once or one by one as you click on the checkbox before any employee name, system gives you options; Present, Half Day, Leave and Absent as you select on any option system will update the Status column.
Figure: Payroll > Mark Attendance
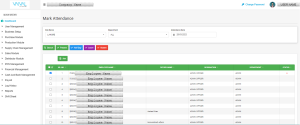
Figure: Payroll > Mark Attendance 2
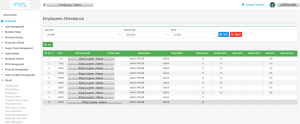
7- Employees Attendance
The Employee attendance screen shows up the full fledged report of attendance. It’s an add-on feature with the “Mark attendance” module.
Figure: Payroll > Employee Attendance
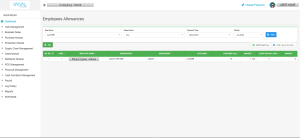
8- Employees Allowances
From this screen you can add up two more allowances, the first one is Overtime which is calculated automatically according to employee per-hour salary you just have to give extra working hours of that employee. The second is to add leave encashment of the employees.
Figure: Payroll > Employee Allowances
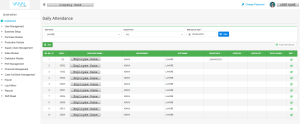
9- Daily Attendance
In the Employee daily attendance screen, if you are marking your employee’s attendance you can lock the timings of the shifts of your employees manually as well through software. You can also change the timings if your employee hasn’t marked correctly.
Figure: Payroll > Daily Attendance
As you click on the Add Attendance button a pop-up will open asking for Check In or Check Out and of which employee. As you provide it with the details it will update that employee’s attendance.
Figure: Payroll > Daily Attendance 2