- April 20, 2023
- Posted by: Muhammad Shoaib Afzal
- Category: VII. POS Management

POS MANAGEMENT
POS management is a module that helps restaurant owners and managers to keep track of their sitting plans, item prices, and recipe information. This is designed to be user-friendly and easy to operate and can be used for a variety of tasks such as maintaining dine-in operations, adding recipes, promotional discounts, etc. POS management can be a valuable tool for any restaurant owner or manager looking to improve their operations, increase efficiency, and boost sales. It has different phases that are shown in the figure given below.
1- ADD FLOOR:
A restaurant with floor plan integration can greatly enhance the functionality of a restaurant by allowing staff to easily manage table reservations, track customer seating, and monitor server performance. When a customer makes a reservation, the floor plan integration feature allows staff to view the layout of the restaurant and select the best table for the customer’s needs.
Figure: POS Management > Add floor

You can also add a new floor by clicking on the ADD FLOOR button. After clicking on Add Floor a pop up will open. Select the Site where to add floors. Write floor name (Hall, Rooftop, Courtyard, e.g.). The floor can be edited and deleted later on. After providing the necessary details click on “SAVE”.
Figure: POS Management > Add floor 2

2- ADD TABLE:
Table management integration in a restaurant POS management system can greatly enhance the functionality of a restaurant, allowing staff to easily manage and assign tables, track customer seating, and monitor server performance, leading to better customer service, increased efficiency, and improved bottom line.
Figure: POS Management > Add Table
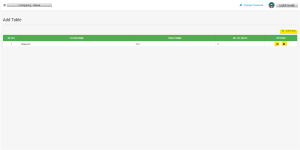
You can also add a new floor by clicking on the ADD TABLE button. After clicking on Add Table a pop up will open. As you click on the floor drop down option all the floors added in the previous screen will be shown, select the floor on which that particular table is present. Write the table name (Table-1, T-1 e.g.).Write the number of seats at that table. The table can be edited and deleted later on. After providing the necessary details click on “SAVE”.
Figure: POS Management > Add Table 2

3- ADD MENU ITEM:
A menu item in a restaurant’s point of sale (POS) system refers to a specific food or drink item offered for sale at the restaurant. The addition of a new item has two phases:
1-Opening a new item in the inventory account.
2-Add the price of the new item.
STEP 1: Open a new item
Figure: Business Setup > Inventory Account> Inventory Listing
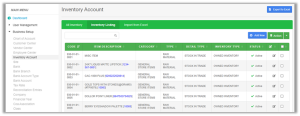
Click the ADD NEW button to add an item. Now a pop-up will appear after filling the necessary data click on “SAVE”.
Figure: Business Setup > Inventory Account> Inventory Listing> Add Inventory

STEP 2: Add the price of a new item
Figure: POS Management > Add Menu Item
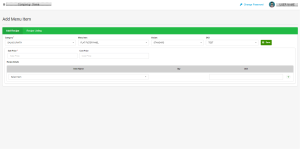
After opening a new item, it is compulsory to add the price of the item for displaying in the POS Restaurant Management System. Prices can be updated later. After adding the necessary details click “SAVE”.
You can also check the prices of all items by clicking on the next tab “Recipe Listing”. You can view and edit the recipe of an item by clicking on the plus sign on the left side of each Item.
Figure: POS Management > Add Menu Item > Recipe Listing
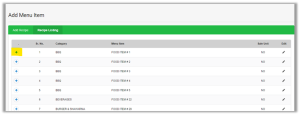
A recipe-based POS system allows you to track ingredients and stock levels, ensuring that you never run out of items needed to prepare menu items. The system can automatically calculate each menu item’s cost based on its ingredients’ cost, helping you control food costs and maintain profitability. With recipe management, the ordering process is streamlined and faster, which can result in improved efficiency and increased sales. We can also manage our recipes of the item and can track our inventory consumptions.
4- DAILY POS PRICE:
Updating prices in the POS system helps ensure that your inventory management is accurate and that you use the most up-to-date information to make decisions about ordering, stocking, and pricing. Keeping prices up to date helps to ensure that you are charging the correct amount for each item, reducing the risk of overcharging or undercharging customers.
*In the case of Trading POS, we add the price of items from the daily POS price module.
Figure: POS Management > Daily POS Price > Price Entry
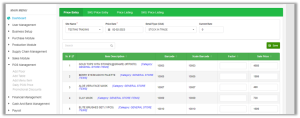
In the navigation bar we have 2 tabs for entering “Price Entry” and “SKU Price Entry” and the other 2 tabs are “Price Listing” and “SKU Price Listing”. The latter are to check the prices that you have added in the former tabs. After entering details in the Entry tabs, click “SAVE”.
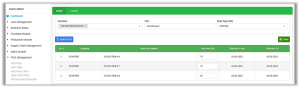
Figure: POS Management > Daily POS Price > SKU Price Entry
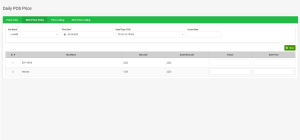
Figure: POS Management > Daily POS Price > Price Listing
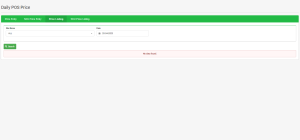
Figure: POS Management > Daily POS Price >SKU Price Listing

5- PROMOTIONAL DISCOUNT:
Retailers can use promotional discounts to drive sales and clear out inventory or to attract new customers and increase brand loyalty. These discounts can be applied automatically to items displayed in the POS system, allowing for quick and efficient transactions.
Figure: POS Management > Promotional Discount
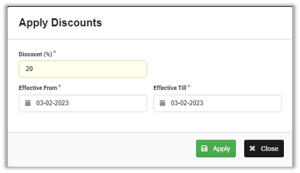
You can also Apply one discount to all of the items by clicking on “Apply on All”. As you click on the button a pop up will appear where the system will ask about the discount rate and effective date start and end. After providing the necessary details click on “SAVE”.
Figure: POS Management > Promotional Discount> Apply on All